Sunday, 22 May 2011

Firemaking Kit

Last winter, our son Luca received the most delightful birthday present. A shiny metal tin containing all you need to get a fire going in any conditions. When I realised what it was, I smiled at my sister-in-law, and she knowingly said "well, I thought it was something you could do together". Too right.

We kept it safe until our first camping trip earlier this month where we could both enjoy it and Luca could make his first true fire.

We planned to use it on our second day when I would have more time to pore over it with him. We opened it together and discovered surprise after surprise. The tin box contained little paper bags full of hardwood twigs, dried holly leaves and dried bark, a bundle of hardwood kindling, a flint, a box of stormproof matches and a veggie peeler (for making tinder shavings). Underneath all this lot was of a packet of marshmallows. Truly heart warming. It was so beautifully considered and packaged you couldn't help but smile.

We decided we would use it to start our afternoon fire for our barbeque supper. During the day we walked the fields around the camp site collecting kindling and fuel from under some of the large trees.

When the time came to light the fire, we used our own tinder and kindling to preserve the beautifully packaged bits in the tin. Luca shaved some soft sticks with the peeler to make more tinder and we started to build what would become our fire. We laid some smaller sticks at the bottom of the X-Grill we had bought with us to stop the tinder from falling through the grill (click here for my earlier review of the X-Grill). We then laid some dried grass, shavings and tiny twigs on top and then a few larger twigs to hold it all down.

Now, we were contending with 20mph plus winds and even stronger gusts, so being on the edge of an open field was probably not the best 'survival' location for fire lighting, but hey, we were camping. The wind made the flint starter a bit of a challenge, so we eventually opted for a storm proof match. Did the trick instantly and the wind made sure the fire took off very quickly.

We loaded it up with the wood we collected earlier and this became the fire that would keep us going all afternoon and evening.


Every time I think of this little tin box I feel warmed inside. It's like a box of little gifts. The joy doesn't stop at the first time either like many presents. You just want it to keep being there. I love it.

The lack of marshmallows in my photos is because by the time I had got the camera out we had already toasted them on a fire the night before. Brilliant idea 'though. Ten out of ten for feel good factor.

Sunday, 8 May 2011

Hungarian Goulash in a Kotlich

COOKED OVER AN OPEN FIRE

I was recently given my first kotlich as an early birthday gift and couldn't wait to get something going in it. A few days camping at Folly Farm in the Cotswolds in the early May bank holiday provided the perfect opportunity.

The kotlich is an eastern European cooking pot (bograc in Hungarian), suspended from a tripod over an open fire. The idea of a goulash seemed a perfect match for my new kotlich's initiation.

I did some digging for traditional goulash recipes and came across some inspiring details on a Budapest tourism website. History, recipes, variations, the lot. The whole thing joined up perfectly when I read that goulash was originally cooked by Hungarian herdsmen in a cast iron pot over an open fire in the fields. With prime quality beef at hand, and a cooking method requiring little attention, it suited (and still does) their life style perfectly.


The recipe I found at the 'Budapest Tourist Guide' is the perfect 'one pot meal', ideal for camping, or even at home on the hob or in a slow cooker. There was a bit of apprehension from my dear wife when I suggested it for our meal as she claimed she had never had a goulash that was flavoursome enough. I dug my heels in and set out to prove otherwise.

RECIPE (serves 4):

- 600g beef shin or shoulder cut into 2-3cm cubes (I could only get brisket)
- 2 tbsp olive oil or lard
- 2 medium onions, chopped
- 2 cloves of garlic, crushed
- 1-2 carrots, diced
- 1 parsnip, diced (I couldn't get one)
- 1-2 celery leaves (I used one stalk, chopped)
- 2 medium tomatoes, skinned and chopped (I didn't bother skinning them)
- 2 green peppers, chopped
- 2-3 medium potatoes, sliced or chopped
- 1 (heaped) tbsp of paprika powder (I used more)
- 1 tsp ground caraway seed (I couldn't get any)
- 1 bay leaf (or more)
- Water (I used water and beer)
- Salt and pepper
- (plus I added a tin of chopped tomatoes)

The great thing about this cooking pot is that it is not fussy about the fire, it just needs heat. Flames, embers, doesn't matter a bit, unlike when cooking directly over fire. And also, when camping, unless you are uber organised or super equipped, everything takes longer.

For the fire, I used our X-Grill portable barbeque (see my earlier article and review), as we weren't allowed to light fires directly on the ground. We'd brought along a box of decent hardwood, my favourite hatchet and had gathered I pile of tinder and kindling from around the farm. We were also contending with 20mph winds and occasional severe gusts that routinely tipped over our camping chairs.

METHOD (Allow at least 3-4 hours depending on the cut of meat)

Get a good fire going under the pot and brown the onions in the oil. Then add the paprika, stirring to prevent burning. Add the beef, garlic and caraway, stirring until the beef changes colour. Add the bay leaf and enough water to cover and leave to cook. This is where I also added the tinned tomatoes.

After an hour and a half or so (when the beef is half cooked), add the potatoes, carrots, parsnip and celery, check for seasoning, and add another 2-3 cups of water if needed.

Finally, when the vegetables and meat are almost done, add the fresh tomato and green pepper and cook for a further 5 minutes or so.

Goulash is often served with csipetke, little dumplings cooked in the sauce, which need to be added five minutes before serving. I didn't do them this time.

The sauce should be rich, aromatic and thick, and ours certainly was. My wife was converted and they all loved it and scraped the pot for seconds. Next time, with caraway, parsnip and dumplings, it can only get better.

After the meal, we sat around the warmth of the fire and toasted a load of marshmallows for our dessert.

The kotlich is a must have camping accessory. Lightweight, easy to pack, easy to clean and really good fun to use.

Click here to get your own kotlich from The Glam Camping Company.

Goulash

Wednesday, 27 April 2011

Garden Spit Roast - Chapter 5

ROTISSERIE CHICKEN, POTATOES, SWEDE, RATATOULLIE & GARLIC BREAD

This pseudo summer with its balmy April evenings has done it for me. Temperatures in the high 20's, with enough humidity to make it feel even warmer has got the whole country doing things normally reserved for the middle of the year. These still evenings have been awash with aromas of back garden barbeques and outdoor chatter.

We'd had a fairly intense weekend entertaining family, so by Easter Monday, chilling out by the charcoal fuelled brazier seemed an ideal option. We took a leisurely walk into town in the morning, had a light brunch at Hacketts in Witney, and bumped into loads of friends on the way. We grabbed a few essentials on the way back and I settled into my seat by the fire for the better part of the late afternoon.

Rotisserie chicken, charcoal baked potatoes and swedes, ratatoullie and garlic bread, all cooked over one decent batch of lumpwood charcoal. My current theme is to do as much as possible with the fire so I'm not forever dashing back and forwards from the kitchen. In this case, everything (except the salads of course) was prepared over one fire.

I piled up about 2.5kg of lumpwood charcoal into my Weber chimney starter and let if take off for a bit whilst I sorted out all the ingredients. This gave me 20 minutes or so to season and skewer the chicken, skewer the spuds and swedes, wrap up the garlic bread and chop up the vegies for the ratatoullie.

Once the charcoal was ready, I spread it around the outside of the brazier so there were no coals directly beneath the chicken. Otherwise the bird would burn and a fat fire would be inevitable. I placed a few rocks in the centre beneath the chicken to absorb the dripping fat and retain some heat.

I was determined not to top up the charcoal but retrospectively I think another 1/2 kilo after the first hour would have sped things up a bit.


RECIPES: (for 4-5)

SPIT ROASTED CHICKEN:

- 1.5 kg whole chicken
- Olive oil
- Salt and pepper
- Mixed dried herbes de Provence

Secure the chicken on to a rotisserie spit, rub with olive oil and season generously with salt and pepper and the dried herbs. Cook over the coals for up to two hours always making sure there is enough heat to keep the skin gently sizzling. Once the chicken starts sizzling, the dried herbs will send amazing smells wafting through your garden. Sprinkle on a few extra bits of charcoal from time to time if need be.

After about two hours remove the chicken from the spit and let it rest wrapped in foil before carving into portions.


SPIT ROASTED POTATOES:

- 4-5 med/large potatoes

Put the potatoes onto a skewer and place around the edge of the fire, rotating every now and then to keep them cooking evenly. It can easily take up to two hours to get nicely roasted potatoes when cooked this way. You could cheat and put them in a microwave for a couple of minutes to get them started off. This would at least halve the cooking time.


RATATOULLIE:

Our summer holidays in France often involved buying the odd rotisserie chicken for supper. Most rotisserie sellers offer 'sauce' with their chickens or meats. This 'sauce' is basically onions and peppers cooking slowly at the bottom of the rotisserie in the fat that drips from the cooking meats. Incredibly tasty. My version was cooked in olive oil in a saucepan directly over the coals.

- 1 red or green pepper, roughly chopped
- 2 cloves of garlic, roughly chopped
- 2 medium onions, roughly chopped
- 1 tin of chopped tomatoes
- 1/2 cup of chicken stock
- Mixed dried herbes de Provence
- Salt and pepper
- 2 tbsp olive oil

Cook the onions and peppers in the hot oil until soft. Add the garlic and tinned tomatoes. One the sauce is simmering again, add the chicken stock a bit at a time as the liquid evaporates. The 'sauce' should be thick, moist and glossy when served.


GARLIC BREAD:

- Bread rolls or baguettes cut into portions
- Butter
- Finely chopped garlic
- Mixed dried herbes de provence

Spread a generous dob of butter on each portion of bread, sprinkle over the garlic and herbs, wrap them in foil and sit them around the edges of the fire to warm up gently. Turn them from time to time so they heat up evenly. They shouldn't take more than ten minutes or so depending on how hot the coals are.


BARBEQUED SWEDE:

- 1/2 swede (rutabaga) cut into 2.5cm cubes
- Olive oil
- Salt and pepper

Thread the cubes onto a metal skewer, brush with olive oil and season with salt and pepper. Place the skewer around the edge of the fire and turn it frequently until soft all the way through. This will take at least an hour and be careful not to let them burn.

Swedes are brilliant for us low carbers, so I am constantly thinking up new ways to serve them.

This was the first time I had tried this, and next time I will par-boil the cubes for 2-3 minutes before barbequeing them. Cooking them wrapped in foil is another thing I will soon try.

Thursday, 21 April 2011

An Indian Meal Cooked Over an Open Fire

Inspired by unusually hot April weather and a family request for a curry meal, I decided that I needed to be outside in that glorious early evening sunshine and cook the whole meal on the barbeque. That's everything, rice, vegetables, bread and the main dish itself.

I'd spent a fair amount of time driving to and from meetings in the afternoon so I had plenty of time to mentally plan how I would do this. It would all be done over charcoal making the most of the gradually decreasing cooking temperature over 45 minutes or so.

I decided on a menu:

- Grilled tiger prawn tandoori kebabs
- Chicken tikka with red peppers and spring onions
- Broccoli with ginger, garlic and spring onion cooked in foil
- Steamed basmati rice
- Wholemeal chapatis
- Cucumber raita

(see below for all recipes)

This meal took a leisurely two hours from start to finish. First I prepared all of the raw ingredients and marinades before lighting the charcoal briquettes in the chimney starter. All of the ingredients and utensils came into the garden with me and the rest was done sitting by the brazier in the early evening sun.

There was a fair amount to prepare so I started by making the chapati dough and wrapping it in foil to be rolled out later. Then the chicken breast pieces were left to marinate in the tikka curry paste and the defrosted tiger prawns in the tandoori marinade. I then prepared all of the onions, red peppers, garlic, and grated ginger for each of the recipes.

The meal was to be served at 6pm, so I needed to ignite the charcoal in the chimney starter just before 5, allowing 20 minutes for the coals to come to temperature. Once the coals were ready I heaped them in the centre of the brazier to create a hot spot in the middle and less hot areas around the edges.

RECIPES (all recipes to serve 4, generously):

GRILLED TIGER PRAWN TANDOORI KEBABS

- 20 defrosted tiger prawns
- 1 tbsp tandoori masala spice mix (I used Natco brand)
- 1 tbsp natural yoghurt
- 2 spring onions cut into 3cm lengths and split down the centre
- Fresh coriander leaves for garnish
- 1 lime cut into 4 wedges

Put the prawns, spice mix and yoghurt in a bowl for 20 minutes or so. Thread the prawns onto metal skewers (or thoroughly soaked bamboo skewers) with a slice of spring onion between the prawns. Grill over the coals about 10 minutes before serving. The coals will be gentler by then. Garnish with the coriander leaves and serve with lime wedges. Makes a great starter.

CHICKEN TIKKA WITH RED PEPPERS & SPRING ONIONS

- 3 large chicken breasts cut into cubes
- 1/2 jar of tikka masala paste (Pataks in this case)
- 2-3 spring onions
- 2 medium onions, roughly chopped
- 1 red pepper chopped
- 1 tin of chopped tomatoes
- 1 large handful of fresh coriander leaves, roughly chopped
- Olive oil

Start by mixing the chicken, tikka masala paste, spring onions and half of the coriander leaves in a bowl to marinate for 1/2 hour or so. Once the coals are ready and at their hottest, fry the chicken marinade mix in a large (metal handled!)  frying pan in the centre of the fire in a bit of oil. Stir constantly for 5 minutes or so until the chicken pieces are mostly cooked. Remove the cooked chicken from the pan and put it back in the bowl and cover with foil.

Add a bit more oil and fry the onions and red peppers until the onions are just soft. You may need to add a bit of liquid (water or beer) to loosen any spices stuck to the pan. Then add the tin of tomatoes, give it a good stir and let the sauce cook down for 10-15 minutes. About 10 minutes before serving, return the chicken pieces to the pan, stir will and bring back to a simmer. Move the pan to the edge to keep it warm.

Serve the chicken tikka masala with a generous garnish of fresh coriander.

BROCCOLI WITH GINGER, GARLIC & SPRING ONION COOKED IN FOIL

- 1 medium sized head of broccoli cut into pieces
- 2cm cube of fresh ginger, grated (I keep ginger in the freezer, easier to grate and always fresh)
- 3-4 cloves of garlic, roughly chopped
- 2-3 spring onions, roughly chopped
- 1/4 cup of water or chicken stock

Find a flat bottomed cereal or pasta bowl and line it with two layers of foil, leaving plenty overhanging the edges. Place the spring onions on the bottom, add the broccoli pieces, and then the garlic and grated ginger on top and add the water or stock. Make a lid (a bit like a pie!) with another piece of foil and tightly seal the edges to make a flat bottomed parcel.

Place the parcel around the edge of the coals turning them every few minutes to make sure it cooks evenly and the bottom doesn't burn. Allow at least 20-30 minutes, slow and gentle is best and it takes a while to start off. If you listen carefully you should just hear a gentle simmer going on inside and a small amount of steam escaping.

STEAMED BASMATI RICE

-1 cup of washed basmati rice
- 2 cups of water
- 2 bay leaves

Put the washed rice, water and bay leaves in a small saucepan with a lid. Put the sauce pan around the edge of the fire without the lid, giving it a shake every now and then until it starts to simmer. Keep checking it and once the water gets to the level of the rice put the lid on and keep it to the edge, turning the pot every now and then. From this point the rice needs only 5 minutes of gentle heat, and then a further five just kept warm with the lid still on. You could remove it from the heat and wrap it in a tea towel.

I would start the rice about 30 minutes before serving. It takes a bit to get going, and will stay hot in the covered pan until needed.

WHOLEMEAL CHAPATIS

One of my all time favourite unleavened breads. Great for camping and can be made with white flour for a softer Mediterranean version. See one of my very first posts: Unleavened Bread

- 200g wholemeal flour (strong or plain)
- 90ml warm water
- 1 tbsp olive oil

Mix the ingredients in a bowl with a knife and knead for a few minutes until fully blended. Wrap the ball of dough in cling film or foil at least an hour before it is required.

It will only take about 5-7 minutes to cook so when ready, divide the dough into 4 and roll each piece out on a floured board to about 20cm in diameter. The coals should be fairly gently by now, so grill the breads a minute or so on each side until puffy and just browned. As they become ready, wrap them in a tea towel to keep them warm and prevent them from drying out. If the fire is really hot when you are cooking them, cook them on a dry skillet instead.

CUCUMBER RAITA

- 1/2 peeled cucumber, chopped
- 2-3 tbsp natural yoghurt
- 1/4 tspn garam masala
- pinch of salt

Mix all of the ingredients in a bowl and serve.

Wednesday, 13 April 2011

Paella Over an Open Fire - Chapter 2

The occasion of occasions, our Charlie's 18th birthday and this was a special request for his ultimate birthday meal. Not surprising really as he had been hassling me for months about cooking a paella. I warned him that I might push the boat out a bit and include some rabbit in the recipe but he was delighted by the idea and so that is how is was to be. It had been nearly two years since I had cooked paella over an open fire when we were camping in the New Forest, so I was as delighted as Charlie.

I pondered over the recipe the night before and resolved to use both chicken and rabbit, plus either mussels or clams, king prawns, chorizo, and the usual capsicum, garlic, onion and saffron. All of this depended on what would be available at the markets on the day.


A trip to the covered market in Oxford (including a visit to my favourite fish monger, Haymans Fisheries), was all it took to satisfy my full list of ingredients (serves 5-6):

3 large chicken thighs
1 whole rabbit (or an extra 3 chicken thighs)
2 medium onions, finely chopped
4 large cloves of garlic, crushed
1 green pepper
2 plum tomatoes, roughly chopped
200g chorizo (2cm cubes)
1 large handful of live mussels
1 large handful of live clams
10-12 frozen shelled tiger prawns
Saffron (about 1/4 tsp)
2 cups of rice (I use basmati as a fluffier alternative to paella rice)
Olive oil
Lemon wedges


You can't rush a good paella. From beginning to end, this took about and hour and a half, and everything was cooked over charcoal briquettes.

First, I prepared all of the vegetables, washed the mussels and clams and cubed the chorizo before filling the Weber chimney starter with the charcoal briquettes. This gave me about 20 minutes to remove the bones from the chicken thighs and remove the flesh from the rabbit. A fairly fiddly task, as there is not a great deal of flesh on a wild rabbit. The loins are fairly easy to remove whole but to get the flesh off the legs requires a small sharp knife and a bit of determination.


Once the briquettes were ready, I put the chicken bones, rabbit carcass, half of the chopped onions and a bit of the garlic in a large pot for the stock. These ingredients were browned off a bit in olive oil before adding about a litre of boiling water. I put a lid on the pot and let it boil vigorously for about 15 minutes. The longer the better of course, but I added a heaped teaspoon of chicken stock powder so I could use it sooner. In the past I have also added chorizo and saffron to the stock pot, but this time I decided to reserve them for the paella pan. I had a couple of spare chicken drumsticks, so I just put them around the edge of the fire to let them slowly grill separately.


While the stock was still boiling away, I pushed it to the side a bit to make room on the hot part of the fire for the paella pan and still allow the stock to simmer.

To make the paella, saute the remaining onions and garlic with the chorizo and saffron in a bit of olive oil in the hot paella pan. then add the chicken and rabbit (cut into cubes) followed by the green pepper and chopped tomatoes.


Once the onions are soft, add the rice and mix thoroughly before adding 4 cups of the stock and covering the pan with a lid or foil. After about 5 or 10 minutes, depending on how hot your fire is, lay the defrosted prawns on the top and leave it a bit longer. The mussels and clams are added about 5 minutes before the rice is cooked, so you need to keep an eye on it and test a bit from time to time.


The steam from the cooking will cause the mussels and clams to open up (keep the pan covered), and once they are all open, the paella is ready to serve. Ours was served simply with a mixed salad and lots of lemon wedges.

This is a great way to cook paella outdoors for family and friends. It's fun to watch and the smell is amazing. Happy 18th birthday Charlie. Love Dad. x


Paella

Sunday, 27 March 2011

Ben's Built-in Braai - Chapter 4

Three days into the English spring and we had been blessed with days of defiant sunshine. Ben and Tersia had finished painting and paving around their braai and saw it fit to invite us and some other friends around to celebrate.

Ben excelled himself and yet again proved how rich and diverse every day South African outdoor cooking actually is. Armed with a bag of lumpwood charcoal and a load of beautifully seasoned English ash we were in for a treat that none of us could have predicted.

In the true traditional way, he started with a selection of sausages, in this case there were three; venison, champagne and pork, and pork chorizo (my favorite), all sourced from our mutual friend and local butcher Clint at Denshams in Witney. Topped up with some corn on the cob and salad, this also served as the main meal for the small army of children who had been occupying themselves building a den of some sort.

King prawns marinated in garlic and lemon juice followed, served with a lemon mayonnaise and cooked on Ben's new Jamie Oliver perforated grilling plate.


Ben had both the braii and the Weber going as the main course included an intensely flavoured pork fillet filled with a herby smoked oyster stuffing that needed to be quickly baked in a hot kettle barbeque.


His venison loin chops were melt in your mouth stuff and were topped with a warm, sticky, home made barbeque sauce. Most bizzarely, the main course was also served with cheese, tomato and onion toasties, gently cooked over the dwindling embers in the braai tool. This was an unexpected treat and one I would highly recommend.


A generous salad of mixed leaves, avocado and olives made the perfect accompaniment to the main meal, both refreshing and robust.

This was a beautiful example of using fire at its best. Grilling sausages at a fairly high temperature over hardwood embers initially, followed by marinated prawns, then the venison chops cooked more gently, and finally the toasties. The Weber did its own separate job and sorted out the quickly roasted stuffed pork loin along side.

Tersia's radioactive waste pudding was another surprise. Crunchy green minty stuff chopped up and laid over the top of 'Tennis' biscuits (yes, and I don't know where that name came from from either, please enlighten me if you do). I've never had anything like this before. Intensely sweet and distinctively flavoured, I can see why South Africans hanker to re-live this experience. Well done and thank you to both of you.


Sunday, 20 March 2011

Haunch of Venison in the Weber

Wrapped in streaky bacon and stuffed with mushrooms, thyme and creme fraische, the 4kg haunch was enought to feed a small army. I used a third of it a a main course for a dinner party for 8 and so had plenty of leftovers.

On this occasion we opted for a very classic menu:

- Smoked salmon plate (discovered in 'Falling Cloudberries' by Tessa Kiros)
- Roast venison haunch with a red wine jus, roast potatoes and swede, steamed julienne carrots and purple sprouting broccoli
-Freshly made pavlova topped with whipped cream, strawberries, raspberries and blueberries

I ordered the venison from my friend and local butcher at Denshams in Witney. I asked for it to be 'tunnel boned' and hoped he might have some caul fat for me to wrap it in. Unfortunately not, so I bought some streaky bacon instead, just enough to cover the top and sides of the joint. He came up with an idea as he was serving me and presented a large fatty membrane from a beef flank. I decided to keep the bacon as well to put around the venison before wrapping the whole thing in the membrane.

Anxious not to risk disappointing my guests, I also bought a new meat thermometer as our old one had come apart some time ago.

FOR THE RED WINE JUS

You can make this in advance and then add the pan juices at the end.

- 1 bottle of red wine for cooking
- 1 red onion, finely chopped
- 1 medium carrot, finely chopped
- 1 stick of celery, finely chopped
- 1/2 litre of chicken stock
- 1 knob of butter
- 1 tablespoon of olive oil
- 1 tablespoon of double cream

Saute the vegetables in the butter and olive oil until soft, then add the wine and simmer it down to at least halve the volume. Add the chicken stock, and reduce it again. Knorr make a superb chicken stock powder labelled 'Chicken Powder' or 'Bot Ga' available in tins from most Chinese supermarkets. I affectionately call it 'powdered chickens' because I'm sure that's what it is! It tastes nothing like any chicken stock cube I've every tried.

Ideally you want to have a decent cup full of jus before straining it and adding the cream to bind it together. These quantities will happily do 8 serves. Allow a good hour or more to make a good jus and keep an eye on it. If you like, you can thicken the sauce with a basic roux but I prefer it just as it comes.

FOR THE MUSHROOM, HERB & CREME FRAISCHE STUFFING

- 200g of mushrooms (any sort) finely chopped
- 1/2 red onion finely chopped
- 1 tablespoon of chopped fresh thyme leaves
- 1 big dollop of of creme fraische
- salt and pepper to taste
- 1 tablespoon of olive oil
- 1 knob of butter


Saute the onion in the olive oil and butter until soft before adding the mushroom and seasoning. Cook out all the moisture and allow to cool completely. Fold in the creme fraische and chopped thyme and set aside.

Venison is very lean so it needs to have fats introduced to help it along during the cooking. This stuffing is great as it provides fat in the centre of the meat to supplement the streaky bacon on the outside.

THE VENISON

- Venison haunch (I had a whole thigh from a 25kg animal)
- Mushroom, herb and creme fraische stuffing (above)
- 8-10 rashers of streaky bacon
- kitchen string


Using a tea spoon, push the stuffing into the bone cavity of the venison with a spoon. Then, with two pieces of string tie both ends of the haunch to give it a nice round shape. Use a third piece of string to close up the ends of the haunch lengthways, but not too tightly or the joint will end out mis-shaped.

Drape the rashers of streaky bacon over the joint to provide plenty of basting fat for the roasting. On this occasion I then wrapped the whole thing in the fatty flank membrane and secured it with a few more pieces of string.

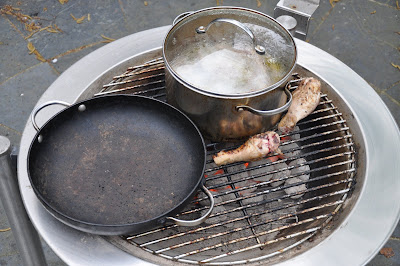
Place the venison on a narrow baking dish in the Weber to retain the juices for basting. I used my trusty pyrex dish which was barely big enough for this one.

Depending on how you like your venison done, a joint of this size will take up to 3 hours to cook in a Weber. I used lumpwood charcoal, a chimney starter full at the beginning (split into two indirect fires) and I topped up the fires twice with a couple of handfuls more charcoal during the cooking. This was also a good opportunity to baste the roast and to let the charcoal re-oxegenate.

Concerned about having the roast ready on time for my guests, I kept checking the inside temperature with the thermometer. Two hours in and the temperature was below the 'rare' scale and seemed to be climbing ever so slowly. I also noticed that the membrane covering was preventing the meat from browning so I made a last minute decision to remove it so I could give the venison a proper basting and hopefully accelerate the cooking for my hungry guests. Miraculously, the roast turned out perfectly, soft and moist on the inside and with loads of nice crispy bits on the outside. 65-70 degrees C at the centre of the roast is what you need to achieve.

Carve the meat thinly and serve with a generous helping of the jus. This is melt-in-your-mouth stuff. Unbelievably tender and intensely flavoured.

FOR THE SMOKED SALMON PLATE (for 8)

Eye food at its best. Meticulous preparation, intense colours, diverse flavours, the perfect appetiser to get the evening going.

- 200g Smoked salmon
- 2 small jars of Salmon caviar
- 24 cocktail Blinis
- 4 hard boiled eggs, white and yolks separated and finely chopped
- Large tablespoon of fresh dill, finely chopped
- 1/2 red onion, finely chopped
- 2 small lemons, filleted as below

To fillet the lemons, slice the top and bottom off of each lemon and sit it flat on the chopping board. Then remove the skin and pith with a small knife. Carefully cut out each segment by running the point of the knife down each side, remove any pips and put the segments in a small dish for use later. Squeeze any remaining juice out of the lemon 'skeleton' and keep it to drizzle over the salmon. Filleting a lemon was a new experience. It took half an hour to remove the fillets of two lemons, but hey, it was beautiful day and I did it sitting at the table bathed in sun in the conservatory.

Chop the red onion into super fine pieces and cover them in water with 1/2 teaspoon of salt. Let them soak for 1/2 hour or so before straining and rinsing them thoroughly.

Carefully assemble the ingredients on a plate and dress the salmon and caviar with the lemon juice. Warm the blinis in the oven for 5 minutes before serving.


FOR THE PAVLOVA (serves up to 12)

- 8 egg whites
- 2/3 cup of castor sugar
- 1 teaspoon of cornflour
- Vanilla essence
- 1/2 pt of whipping cream
- berries for the topping

Pre-heat the oven to 180 deg C. Beat the egg white on a high speed in a mixing bowl until softly stiff. Slowly add the castor sugar, cornflour and vanilla essence on a lower speed until thick and glossy. Using a spatula, put the pavlova mix out onto a flat baking tray lined with grease proof paper. Shape it into a round about 25cm in diameter and make a shallow well on top.

Bake it at 180 degrees for 20 minutes, and then at 120 degrees for a further hour. Remove from the oven and allow to cool completely.

Just before serving, whip the cream, spread it over the top and dress with the berries.

I kept the left over egg yolks in the fridge and used them the following day to make fresh custard.


Related Posts with Thumbnails