Saturday 26 December 2009

Leftover Christmas Turkey Lasagne


I reckon that in our family, turkey lasagne is more awaited than the Christmas turkey itself. It's a great way to use the stock from the bones plus the leg and thigh meat left over from your Christmas feast.

This dish is best prepared a day ahead, leaving the final baking for the day of serving. It can also be frozen before baking. This batch was big enough to make one large and one medium lasagne. The smaller one went in the freezer.

Preparation time: 3 hours
Baking time: 45 mins
Serves: 10-12

INGREDIENTS:

For the ragu:

- 1kg cooked turkey meat, roughly chopped
- 8-10 cloves of garlic, crushed
- 2-3 tablespoons olive oil
- 1 glass of white wine
- 1/2 of a 200g tube of tomato puree
- 3 x 680g jars of tomato passata
- 2 teaspoons of salt

For the turkey stock:

- 2 onions halved (skin on)
- 3 medium carrots, halved
- 1 small celery stick
- 2-3 tablespoons of olive oil
- Turkey carcase, broken up
- 2 teaspoons salt
- Enough water to cover

For the white sauce:

- 2 tablespoons of plain flour
- 50g butter
- 400ml of turkey stock
- Salt and pepper to taste

For the final assembly and topping:

- 500g lasagne sheets
- 250g grated mozzarella cheese

METHOD:

First remove the meat from the carcass and roughly chop it. Then start off the stock by sauteing the onions, carrots and celery for a few minutes in a large stock pot (mine is 9 litres), add the turkey carcass, cover with water and bring to the boil. Simmer gently with the lid partly on for 2-3 hours.


Once the stock has been started, begin making the ragu in another large saucepan (6 litres minimum). Add the crushed garlic, olive oil and tomato puree to the pot on a medium heat. Cook for a few minutes, stirring constantly so as not to burn the garlic, then add the white wine and cook gently for a few minutes until the base starts to thicken slightly. At this point, the smell is amazing.

Then add the 3 bottles of passata, bring to the boil and simmer very gently for 2 - 2 1/2 hours, stirring occasionally. The turkey meat is already cooked so it goes into the ragu after the sauce is cooked and only for a further 20 minutes or so.


For the white sauce, melt the butter in a small sauce pan, add the flour and mix thoroughly before adding the stock. Cook gently whisking constantly until it reaches a thick but pourable consistency.

For the final assembly in a large shallow pan, poach the lasagne sheets 2 -3 at a time in turkey stock for just a couple of minutes to soften them slightly.


(After all this plus making a turkey pie filling (see photo below), I was left with almost a litre of stock which went in the freezer for another day.)

Get two lasagne dishes and start with a layer of pasta at the bottom. Then a layer of ragu, another layer of pasta, another of ragu and so on until finishing with a layer of pasta topped with a thin coating of the white sauce before the final sprinkling of grated mozzarella.

The lasagne can now either be baked straight away at 180 deg for 45 mins, or stored in the fridge for a couple of days before baking. Alternatively it can be frozen and enjoyed after the turkey mania has subsided a bit.

Friday 18 December 2009

42 Ghanaian Chillies in a Jar

FIREFOODIE'S CHRISTMAS CHILLI - BATCH #2

This is the result of batch #2 following my previous Firefoodie's Christmas Chilli article posted earlier this month. I relented and purchased a tray of 60 very cute 3 oz jars with gold lids to overcome my label removal angst. I asked the green grocer at the market in Witney to get hold of a box of chillies for my second round of little gifts for me to collect the following week.

I collected the box early in the morning (see the gap above the fennel) and psyched myself up for another intense evening. This time, my son Charlie helped with the tailing of the chillies, and we managed the whole batch in just over an hour. 16 x 200g batches in the food processor to be precise. We worked out that we tailed just short of 1600 of the treasures by hand.

Once the garlic was added and the chilli was cooked down with the olive oil, vinegar (about 300ml of each), salt (2 tbsp) and a bit of water (Charlie had retired by now), I filled 38 jars with Batch #2 of my addictive relish. They were then simmered in a large baking tray and topped with extra virgin olive oil before sealing, cooling and labelling.

If you are amongst the privileged few in possession of one of these little jars, it's great with cheddar cheese and cracker biscuits. Add a nice cold beer, and you have found another room in firefoodie heaven.

Remember to add a bit of olive oil to the jar each time you use some, enough to cover the chilli. It will keep it fresh for ages and you will get more out of the jar. Enjoy.


Thursday 3 December 2009

Firefoodie's Christmas Chilli

I've been waiting all year for this. Since discovering that whole fresh chillies last forever in the freezer, I've been collecting them in preparation. This batch was made from about 3kg of chillies from various markets and enthusiastic friends with a few pots in the garden.

Collecting the jars is a year long task. I'm constantly making sure that the jars and lids I sneak into the dishwasher don't end out in the recycling care of our enthusiastic kids. I'm sure I'm short this year and have already started thinking about buying jars in bulk heaven forbid.

Label adhesives. One of my bug bears. There needs to be some international legislation governing what type of glue manufacturers use to stick labels on to jars. I soak my jars in water, and this is ok for about 2/3 of them, but the remaining ones need either oil, white spirit or methanol to remove the adhesive from the glass. I've almost become an expert on the chemical make up of various adhesives, and even worse, have started to select brands in the supermarket based on how easy the labels are to remove! Retailers out there... take heed. Glass is great and needs to be re-used, but don't make it so difficult that no one bothers. Enough ranting.

This method is a good way to preserve chilli for the pantry which literally lasts for years. Once opened keep it in the fridge and it will still last a month or so if it's not all eaten by then. We put ours on toast with cheese, in sandwiches, and generally just on the table to add to anything for a bit of a kick. The unique garlicky taste is quite addictive. It is freshly 'peppery' in the capsicum sense of the word and the bit of olive oil used to finish it helps spread the heat and aroma when used.

It's labour intensive, but totally worth it. It took me about an hour and a half to trim the stalks off each individual chilli before putting them in 15 x 200g batches in our food processor to roughly chop them up. 4 bulbs of garlic were then separated, squashed, peeled and finely chopped (in the same food processor) before adding to the chilli in a large pot.

I added a cup of olive oil, 1/4 cup of malt vinegar, 1/4 cup of cider vinegar and a tablespoon of salt. The mix was put on a low heat with a lid and stirred occasionally until the liquid released from the chilli and the mix then steamed in it's own moisture. For this amount it took about about an hour or so before it was ready to distribute into jars.

Then I tasted it. Beware if you have some (you will know who you are because this one is batch no. 1, and it's written on the label). I put a half a teaspoon on a water biscuit to test it and just barely survived. It's hot, so use sparingly and with love. The longer it lasts you the happier you will be. This batch made a mere 11 jars, about 250g net each, which is a lot of happiness. Upping the quantum is my next challenge, I mean 3 hours, 11 jars, 3kg chilli, that's about 20 minutes and 300g of chilli per jar. Commerce this is not.

Once in jars I placed them with the lids loosely on in a large baking dish of simmering water for another hour before sealing them for the long term. Once the lids are sealed, the contents then cool and create a vacuum in the jar with the minimum amount of oxygen and living organisms. Garlic is of course one of natures best preservatives, so you cant go wrong. I've had jars in the pantry for 2 years and they taste as good when opened if not better than when first made. Keep it moist with a bit of olive oil as you use it just to keep the nasties at bay. Enjoy.

Merry Christmas from Firefoodie.

Sunday 15 November 2009

Perfect Christmas Turkey on the Weber

This simple recipe is the result of many Christmas’s experimenting with turkey and other poultry in a kettle barbeque in both the English winter and Australian summer.

On this particular Christmas, we served an 8.5 kg (20 lb) turkey for a late afternoon Christmas dinner. The plan was to have plenty of leftovers for turkey lasagne, turkey pasties, cold meat and stock. It worked a treat. I managed to feed 9 with one breast, stuffing and one thigh (loads of trimmings and vegetables helped). The next few days were spent preparing and storing the remainder of our every-two-year turkey delights.

One advantage of the kettle barbeque is that it frees up the oven and you can cook a much larger bird than you would be able to in the kitchen.

This is from my archive and what really happened a Christmas (or two) ago.

CHRISTMAS EVE:

Collect your pre-ordered turkey from your local butcher. Enjoy the queues and conversations that go with it.

Pre-prepare in advance everything possible… like the bread sauce and stuffing for example, so all that is left to do is to cook the turkey and prepare and cook the potatoes, parsnips, brussel sprouts and carrots.

This year I planned a pre-dinner snack of home made sausage rolls and devils on horseback which were also prepared on Christmas Eve.

CHRISTMAS DAY:

Juggling catering obligations with gift opening demands of the kids and family is always a challenge. I write out a schedule a few days before so it is easier to judge the timing and arrange tasks on the day. The main job for the morning is to prepare and cook the turkey. Once the turkey is on the charcoal cooking fire, the preparation of the giblet gravy, vegetables and other compliments then simply falls into place.

I tried a new method for the giblet stock and gravy this time. The neck, heart, liver and kidneys were sauted in a dob of butter with a few whole carrots, bay leaves and peppercorns until lightly browned before adding water and a couple of unpeeled onions.

The stock simmered on the stove for almost as long as the turkey was in the Weber. Masses of gravy was produced, enough for the meal and plenty left over for the turkey pasty filling.

A 20 lb turkey will take about 3¼ hours to cook in a kettle barbeque and then a further 30-60 minutes to carve and serve. Having it ready early is fine as it will stay hot carved or un-carved under foil for an hour or more. The fire will take 30-40 minutes from scratch to mature, so you need to work out at what time it needs to be lit to ensure that your meal will be on the table when you need it to be. Remove the turkey from the fridge early in the day so it returns to room temperature before cooking. This is important especially in the winter as the barbeque will be under enough stress to keep hot as it is.

Get your pre-prepared stuffing ready (I use a well seasoned mixture of sausage meat, fresh breadcrumbs and a bit of grated lemon rind - see Chapter 3) and then put your hand in the neck cavity and carefully work apart the skin from the breast meat with your fingers. Then, a bit at a time, push small handfuls of stuffing under the skin and squash it down to create a thick (up to an inch or so) layer over the whole of the breast. The main cavity is best left open to allow the heat from the fire to cook the turkey from the inside without interfering with your cooking times.

Rub the whole skin with some olive oil and sprinkle with salt before placing the turkey on a large baking dish on the rack of the barbeque. The baking dish will ensure that you safely reserve cooking juices and fat for basting during cooking. Open the lid of the barbeque every 45 minutes or so to check the fire and allow it to re-oxygenate while you baste. You will probably need to add just a chunk or two of charcoal to each side of the barbeque during these times to keep the temperature fairly steady. Don’t worry if the breast starts looking a bit overdone, this is just the stuffing layer doing its job of protecting the white meat during cooking. If the turkey is just gently sizzling, you will know that the temperature of the fire is just right.

Once cooked, serving the turkey should be easy. Cover it with foil and let it stand for half an hour or so, and then with a pair of tongs and a short sharp knife, carefully remove an entire breast in one piece and set it aside. Then remove a thigh with a bit of wiggling and a bit of help from your knife. Remove the thigh bone before slicing the meat across the grain of the muscles. Slice the breast in the same way, across the grain in ¼ - ½ in slices, leaving a thick layer of aromatic stuffing on the outside of each slice. The stuffing may be a little burnt on the outside, but this has only helped to protect the more delicate breast meat from over cooking and drying out.

Protect the uncarved turkey with foil to keep it moist for later. Place the carved meat onto a warmed tray and cover with foil to give you time to serve the vegetables and trimmings onto hot plates before serving the turkey slices and finishing with piping hot giblet gravy.

Merry Christmas!

P.S. For some photos of our 2009 Christmas turkey have a look at Perfect Christmas Turkey in the Weber - Chapter 2. I'm already planning the 2010 version, it's just a few weeks away...

Wednesday 28 October 2009

Ben's Boerewors Braai

This is the South African version of good old bangers and mash.

A few weeks ago my South African friend Ben gave me a proper boerewors made to his Mum's recipe by our local butcher and mutual friend Clint.

A blustery, wet autumn Saturday with the (false) promise of a dry evening was enough to inspire me to fire up the brazier. My Mum was with us from Australia, and all of the kids were away except for our youngest, and I know how he loves a fire.

The boerewors had been in the freezer for a couple of weeks, and once I decided it was to be our meal for the night, I rang Ben for some advice on accompaniments. I had forgotten that he was on holiday in Croatia, so the rest of the afternoon involved much texting. Including suggesting I go to Waitrose for some Mrs Ball's South African Chutney. Which I did.

Our brazier has recently been enshrined in a circle of slate, and this was the first time a meal has been prepared there since I laid the paving. The fire was started with paper, twigs and kindling, and once established, charcoal was piled on top. Luca couldn't leave it alone despite my reminders that this was a 'cooking fire', and not to mess with it. My trusty braai tool was deployed and the sausage grilled nicely as the evening set in. Luca experimented with toasting some stale baggettes which had to be relocated each time the brai tool was turned over. Once cooked, I kept the boerwors warm in the oven so I could finish off the vegies and red onion sauce.

On the hob, the red onions had been cooked slowly in red wine and butter for a good hour, and the potatoes prepared for the mash. Some frozen petit pois added some nice colour and Mrs Ball's chutney was a super-sweet experience. Made only from fruit, spices and loads of sugar, you can see how most of South Africa is addicted to it. In Ben's words, 'the only thing it doesn't go with is ice cream!'

So thanks Ben, the boerewors was delicious.

Sunday 27 September 2009

Crayfishing at Minster Lovell

These bad boys are Satan spawn. Intelligent or stupid I can't work it out. A 150mm critter will think it is worthwhile to attack me for example. Super aggressive, cannibalistic, and pillagers of our environment, American Signal Crayfish were introduced into the UK in the 1970's to supply restaurants with their exotic flesh.

This titbit from The Telegraph published in June 2008 says it all:

"...SIGNAL CRAYFISH FACTS

The female breeds from the age of about two when it is 40mm long.
She breeds once a year and averages 275 eggs.
The eggs are fertilised by the male in October/November.
They are carried by the female folded within her tail until May when the young are released - if they can escape her jaws.The Signal is bigger and more aggressive than native crayfish.
They are less fussy in what they eat and more successful and rapidly colonise new areas.
The Signal carries a fungus which is fatal to native crayfish.
They can live up to 12 years..."

Therefore, I delight in pulling them from the rivers and plunging them into boiling water alive.
One humane way to kill shellfish is to freeze them, so they enter into a dormant state before they die and then boil them, but watching them swim in boiling water just proves their resilience and warrior like temperament.

Last Saturday, myself and my good friend Cai took our seven year old boys down to the river by the ruins of Minster Lovell Hall near Witney for some crayfishing fun. In just over an hour we landed over 20 using a simple technique involving raw meat tied to the ends of pieces of string. I have a lump of venison in the freezer that gets dragged down to the river's edge, then chunks get cut off it, and it is re-frozen after each time we go crayfishing. This lump must be at least three years old. Amazingly still fresh and just pungent
enough to act as perfect bait for these unfussy eaters.

Between us we laid five lines along the river bank, and after ten minutes or so, were pulling one if not two from each line. By the time the five lines had been worked, more crayfish would be nibbling on the first line to start the process all over again. We managed 20 in an hour, and if it weren't for time pressure, I could have kept going all day.

I use white kitchen string with a 2 x 2 cm piece of venison tied to the end. The bait sinks slowly to the river bed, and the colour of the string makes it easier to see if the bait is being nibbled at. I then slowly pull the string so that the crayfish follows the bait until I can get it close enough to the bank to scoop up the catch with a hand held net. So much fun, especially when you get more than one at a time.

A group near us were using small net bags (the type that you put washing tablets in a washing machine), filled with some kind of meat. I have to say that my method intuitively feels better, as the crayfish can properly nibble away at it for a while until you start to pull it towards the net, so they perhaps feel more like chasing it. Who knows. Great fun all the same.

I gave my share of the catch to my friend Cai, mainly because I didn't have the time this particular weekend to shell and prepare the meat. Not much flesh comes from each critter so you need a lot for a meal, at least 15 for a starter or as many as 30 for a main course for one person. There is a good couple of hours de-shelling for this many so make sure you have plenty of time. If you're up for it here goes:

FRESH CRAYFISH

15-20 live crayfish per person

Humane method: Put the catch in a bag and freeze before plunging into boiling water

Sadistic method: Plunge the catch in a very large pot of boiling water (one at a time or the water cools too much and they stay alive for a bit too long)

Once the crayfish have turned orange and the tails are coiled up into a tight ball, remove them from the cooking water and let them cool (or cool them under cold running water).

Break off the claws and remove the body from the tail.

Discard the body, and remove the shell from the tail, pulling out the tube running down the tail as you go.

Using a small hammer, gently tap the claws to crack them so that the shell can be removed and the flesh inside recovered.

Put aside the flesh in a bowl, and gather the fragments of shell (not the bodies) together and rinse them under cold water.

Melt a tablespoon of butter in a frying pan and gently saute the shell fragments in the butter. Strain the shells from the butter and drizzle the shell flavoured butter over the crayfish flesh.

Serve with warm bread and a green salad.

American Signal Crayfish flesh is quite bland in flavour, but this method extracts the crayfish flavour from the shell. A squeeze of fresh lemon or dash of vinegar helps too.

Buon appetito!

(See this article in "theblogpaper")


Wednesday 26 August 2009

Roxy Joins the Family

Roxy is our newly aquired 1972 VW Dormobile camper van. I've been commuting to Oxford in her for a week or so now and have started to become more used to the details and idiosyncrasies of the 37 year old camper. Having been a teenager in the late 70's really helped, this type of driving was normal then and it really makes you realise how you come to expect the luxuries of modern motoring. She has a top speed of about 55mph and we are busy researching great locations within a couple of hours drive from home.

We're still doing a bit of work restoring her original interior fittings, so meanwhile, I dream of days out and weekends away with Roxy and the 'go anywhere' Weber barbeque. The rotisserie will definitely feature in future outings too.

Sunday 26 July 2009

Paella Cooked Over an Open Fire

It's been almost a year since my Paella on the Beach (A Fantasy) article. I have been seeking an opportunity to cook paella over an open fire ever since being seduced by a story in one of my long lost Time Life cookbooks in the eighties. The origins of the dish have been explained in more detail in my earlier article (above) but it is enough to say that it was originally an inland dish in Spain, cooked by farm workers for lunch over an open fire, and made with whatever was available.


The experience began with us taking a short weekend camping break to the New Forest. This meant travelling 'light' and making the decision NOT to take the ever faithful 'go anywhere weber'. We were to rely on the butane fuelled camp cooker for everything. On the first night I realised my cock-up. I had a mis-matched gas regulator, so no camp cooker, and no other means of cooking anything for the weekend. I realised this just after we finished setting up camp on the Friday afternoon before making our way to visit some family friends for a meal not too far away.

The general air of panic subsided as I started to formulate a solution in my mind. This was focused around how on earth would we be able to cook breakfast the following morning. No gas, ok, accepted. No shops open early enough to get a new regulator in time to cook breakfast, accepted. A way out began to emerge.


We needed to get some diesel for the car and I thought that one of those (heaven forbid) disposable barbeques might do the trick, at least to get over the breakfast hurdle. So I fuelled up the Kia en route and collected two disposable barbeques and a 5 kg bag of lumpwood charcoal from the forecourt (hellishly expensive) to relieve the family's anxieties about breakfast on a campsite with scant facilites.

A few campsite rules were niggling as I was driving. No barbeques on the ground for example. So I asked our fabulous hosts that evening for a few bricks to keep the container of charcoal off the ground. We left with a large concrete block and two clay bricks. The obvious components for an impromptu DIY charcoal barbeque.

It was while I was cooking breakfast the next morning that I decided on Paella and how to make the most of the current barbeque setup.


The spirit soaked briquettes in their foil container had more
bark than bite. I was hoping to boil the kettle on the first intense part of the burn, and then follow by putting my pan on the embers to cook the bacon, tomoatoes and eggs. What a pain. A handful of briquettes (10 if I counted correctly) got hot quickly but not for long. The kettle took forever to boil and the breakfast was more stewed than fried, but it got me thinking about the rest of the day.


After a late breakfast we went into a camping shop in Lyndhurst for a new regulator and then to the coast so the kids could enjoy the beach. Nice and sunny but far too windy so we decided to go back inland to the campsite near Brockenhurst.

We gathered some provisions from Waitrose in Christchurch on the way. I had already by then revealed my intention to make paella at the campsite for dinner and what better a place to get the ingredients: (enough for four adults)

- Fresh clams (no mussels available)
- Cooked king prawns (shelled and easy to eat, raw variety too expensive)
- Chorizo
- Saffron
- 8 chicken thighs
- 1 large onion
- 1 Green pepper
- 1 Bulb of garlic
- Salt and pepper
- Basmati rice (2 cups)
- Water for the stock
- (forgot to get lemons but they would have helped)


Paella die hards will probably wince at my choice of rice. Traditional paella rice is firm and stodgy, where basmati rice is light and fluffy. I first used basmati rice because I thought that I had paella rice in the pantry when I hadn't. It's different, but it works really well. It allows more of the other ingredients to fill the bowl, and the rice is a richly flavoured but not overwhelming accompaniment.

The whole afternoon was spent in the sun at the campsite. Firefoodie heaven. I managed to stretch out the making of the paella for the best part of three leisurely hours.

I took the bones out of the chicken thighs for the stock and diced the flesh for the paella. Then I chopped up all of the vegetables and chorizo for the dish (with some help from our Kitty) and then prepared a structure from the 3 brick items for the fire.


The breakfast episode taught me that extra charcoal was the answer to the measly fire from a disposable barbeque. I piled up a good kilo or more of lumpwood charcoal on top of the alcohol soaked briquettes and constructed a brick home for the tray of charcoal that would also suit my paella dish. The large concrete block formed the base and the two bricks were placed either side as supports for the handles of the pan.


To cook paella this way, first you need to make a good stock. This takes lots of heat and a fair amount of time. I got the chicken bones, some of the garlic, half of the diced onion, a few pieces of the diced chorizo and some salt and pepper for the first stage of the meal.

The extra charcoal worked and the pan was good and hot. I browned off the bones and other ingredients in a dash of olive oil, and slowly added enough water so that I would have about 4 cups of stock. After half an hour or so, I removed the bones and discarded them before transferring the stock and all the bits in it to another pan and set it aside.


Then the remaining vegetables, saffron and chorizo were browned in the paella dish over a high heat from the charcoal before I added the diced chicken thighs. After about 10 minutes, I added 2 cups of rice and 4 cups of the stock prepared earlier. Then the clams and prawns were laid on top, the pan was covered with foil, and then checked every now and then for the next 30 minutes or so before serving.

Towards the end the cooking needs to slow down, so I removed some of the charcoal from below as my fire was still a bit too hot.

This meal went down a treat and my paella over an open fire fantasy was finally fulfilled.

(iPhone photography by Kitty)

Paella

Wednesday 22 July 2009

Beetroot Braised in Vinegar and Mint

This is great side dish to accompany any main course menu. Wrapped in foil, this simply sits below the rotisserie, baking slowly for up to 2 hours.

Fresh beetroot seems to be everywhere at the moment and I can't resist a bargain at the markets on a Saturday. I ended up with loads of the stuff which is fine because it lasts for ages. For two consecutive weekend dinner parties I served it as a side dish and it almost out did the main event.

Peel each beet and if too big, cut in half. Bunch the pieces up on a large piece of foil, turn up the edges so you can pour in a few dashes of cider vinegar (or any other vinegar), dump in a handful of fresh mint leaves and seal up the parcel. An extra layer of foil helps just in case there are any tiny holes for the liquid to escape.

I put the parcel between the charcoal fires under the rotisserie, but you could put them anywhere where they would benefit from a long slow cook near embers. Basically, the equivalent of a medium oven for up to two hours.

The beetroot ends out soft but firm and the flavour of the vinegar and mint absorbs into the beets beautifully. Aromatic, pretty and delicious.

Tuesday 30 June 2009

The Best Roast Pork Ever

My second experiment with the garden spit roast gizmo gave me something very special recently. We had invited a few friends over on a Saturday night and a 3 kilo rolled pork shoulder had been loaded on the spit by my local butcher in preparation.

Pork comes into its own on the rotisserie. The self basting and high temperature radiant heat from the charcoal makes crackling to die for and perfectly moist pork within. This one was studded with loads of garlic and sprigs of rosemary and took about two hours over the fire. Our guests loved it and I will be definitely doing it again.

In the past weeks the cooking fire has been getting a hammering, almost too much so to keep up with posting articles. A few revelations have occured however:

1. THE GAS BARBEQUE: Mine is knackered. A wedding present from my Mum nearly 9 years ago, and the burners have corroded beyond repair. My obsession with experimenting with charcoal is now making me flinch at the idea of getting a replacement. Given that it takes 20 minutes to prepare a charcoal fire I am struggling to convince myself I need another one, but hey, it is the middle of summer. They definitely have their place 'though as a great way to cook outdoors (Viva the Gas Barbeque).

2. SELF LIGHTING CHARCOAL: I used some tonight. Basically charcoal soaked in wax wrapped in paper soaked in wax in convenient (and clean!) 1kg bundles. Provided that you let the fuel burn for the full 20 mins or so, there is nothing wrong with this. There is no smoke from natural wood tinder or smelly firelighters and once the wax has burned, there is no residue or smell to affect your cooking. Go for it. More expensive than pure lumpwood charcoal 'though, the only disadvantage I can think of. It could even be mixed with normal charcoal to make it more economical but would then be as messy as using lumpwood.

3. THE BRAAI TOOL: This has also had a beating lately since its maiden voyage during the Surreal Sub-Zero Boerewors Braai. This baby is fast becoming one of my preferred tools for grilling sausages, chops and thinner cuts of meat. It means I get to sit by the fire and keep an eye on the food. Perfect for using over the embers of an open fire or a brazier, but keep a few bricks or rocks at hand to rest it on to adjust the height over the coals. When clamping sausages between the two racks, leave a gap between each one to allow the heat to cook them from all sides.

Sunday 31 May 2009

Garden Spit Roast - Chapter 2

What happened next was so unexpected. I had spent the morning in the sun digging up turf preparing for a new patio and spent most of the time mentally planning the next phase of the DIY garden rotisserie for the same evening. A 2 kilo piece of topside beef had been defrosting since the morning and I went on a hunt in town for some 60cm heavy duty skewers (3 to be exact) so I could try out my next DIY rotisserie experiment to follow Chapter 1 posted last month.

A recent and much awaited addition to the high street in our town, the Steamer Trading Cookshop, was my first port of call. No long skewers sadly, but my conversation with the delightfully helpful and subtly inquisitive person serving me led to a most unexpected result. I explained that I needed the skewers for my DIY garden rotisserie experiment, and was almost sent to the local Countrywide outlet for a steel fence post before I was informed that they had rotisseries in stock.

Over the last couple of years my Fire Food research folder has accumulated dozens of links to websites selling various rotisserie accessories, all very pricey and mostly from America. But here it was, the ultimate garden spit roast companion. Affordable, versatile, battery powered and there for the taking. I did a double take on the price (£18.47) as it just seemed too good to be true. It was as much a novelty to the person serving me when we opened the box to check the contents. Everything, heavy duty 60 cm steel spit, motor, holding forks, all the things I had been drooling over on various US websites for ages. It was an intoxicating experience and I thank Rose at the Steamer Trading Cookshop in Witney for subtly cajoling me into divulging my intentions.

My long suffering family smiled wryly when I returned home beaming, with my new acquisition, my intoxication even further heightened by then as more time had passed to reflect on my result.

Without delay, the charcoal fires were prepared in the brazier. The topside was then butterflied, stuffed with garlic, green olives and oregano from the garden, rolled up and tied with string for the spit. So as not to waste the opportunity I had also bought a free range chicken to share the spit for a meal the following day when there wouldn't be the time for such indulgences.

Around 2 hours later, we devoured the beef and the chicken was wrapped in foil for re-heating later. Everything worked perfectly and the meat looked and tasted fabulous.

I managed to get the rotisserie brackets to connect to my brazier without too much hassle. The kit is sold as an accessory to the "Hotspot" branded charcoal grill, but will work with any Weber or other kettle barbecue or brazier without too much difficulty. I'm now thinking of a design for a portable steel bar frame so it can be used in the wild over an open fire. Watch this space. Spit roasted goat is next.

Firefoodie.

PS (March 2010): For some extreme DIY spit roasting, I found this recently. I was well impressed...: http://forums.egullet.org/index.php?/topic/125444-my-first-spit-roast/

Saturday 30 May 2009

Grilled Mussels with Garlic Butter and Parmesan

This delight was prepared in honour of a visit from our beloved (pesco-)vegetarian daughter on a glorious summery spring evening. It was served as a very moreish appetizer and was followed by mackerel tempura and salmon and swordfish yakitori.

I had something similar to this for the first time when visiting friends in Cape Town. They were made using pre-cooked frozen mussels in the half shell, which cuts down on the preparation a little. This version is made with fresh live mussels.

I hand selected two dozen large mussels from my favourite fish monger at the covered market in Oxford (Haymans Fisheries) during my lunch break. As an appetizer, allow about 6 large mussels per person.


Simply put the mussels in a pot with a lid with about 50ml of boiling water for 5 mins or so, or until all the mussels have opened. Allow them to cool enough to be able to be handled.

To prepare the garlic butter, put 2 or 3 large cloves of crushed garlic in a small bowl with about 50g of butter in the microwave for about 30 seconds or until the butter has just melted. Grate about 50g of fresh parmesan cheese.

Pre-heat the grill, then remove half of the shell from each mussel and using a small knife, detach the cooked mussel from the remaining half of the shell. Lay 
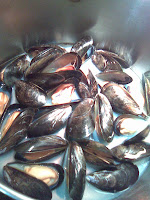
the mussels in their half shells on the grill tray, and using a teaspoon, dress each one first with a bit of the melted garlic butter and then with a sprinkling of grated parmesan.

Place them under the hot grill for no more than 3 or 4 minutes before transferring them to a serving dish and passing them around to your guests. Guaranteed to make you hungrier.

(Click here to see the newer article - Better photos and cooked using charcoal in a Weber - July 2011)

Tuesday 28 April 2009

Garden Spit Roast - Chapter 1

This is a simple and small scale introduction to creating your own DIY spit roast or rotisserie barbeque at home. It captures all of the principles of a charcoal spit roast and gets the imagination going for more.

Inspired by the beautiful spring evening sun, I found this to be an opportunity to test a few theories using tools already at hand.

I'm embarrased to admit how much research I have done over the years on spit roasting. It is thought that Peking man may have roasted meats (c. 700,000 BC), but from whenever it began, spit roasting was virtually the sole culinary technique used by our ancestors during the Paleolithic period (Old Stone Age). This was until, the Aurignacian people of Southern France (c. 30,000 BC) began steaming food by wrapping it in wet leaves. Today spit roasting has evolved to become anything from the global doner kebab to rotisserie chickens and whole hog roasts.

There are a number of (fairly expensive) spit roasting gizmos on the market. Clockwork, battery or mains powered, none of which are particularly easy to get hold of in the UK. I prefer the DIY approach: Easily found, ready made objects, and lots of care and attention. Regardless, the principles of spit roasting remain the same;

- Self basting and slow cooking from constant rotation
- Indirect heat for cooking

Keeping the meat rotating means that the fats and juices remain on the surface longer and cook the meat evenly. The sugars caramelise without burning creating that wonderful sticky, rich tasting surface.

Indirect heat means not having any fuel directly below the food. Inevitable drips would otherwise ignite and create seriously unwanted flames from a fat fire below. Keeping the heat source to the side(s) means that drips can be caught in a tray if needed and used for extra manual basting.

This is so simple anyone can try it. I used 1 kg of chicken wings, cut into segments (discard the wing tips) and spiked them onto two pairs of metal skewers so they could be easily turned.

I prepared a charcoal fire in my trusty 'Go Anywhere Weber" and waited for the fire to mature before aranging the embers into three rows. I then placed the two chicken wing kebabs between the rows of embers and turned them every 30 seconds or so by hand. The chicken wings had been marinating for a few hours in crushed garlic, olive oil and rosemary. The smell was amazing.

30 minutes later, the chicken wings were ready.

The garden spit roast requires only one special commitment. Stay by the fire and don't stop rotating the food until it's cooked. This might seem extreme, but let's face it, why would you want to be anywhere else?

If this does it for you, the coming chapters will up the scale somewhat. This spring and summer look forward to whole chickens spit roasted in the garden, and then finally some big chunks of goat.

Firefoodie

PS (March 2010): For some extreme DIY spit roasting, I found this recently. I was well impressed...: http://forums.egullet.org/index.php?/topic/125444-my-first-spit-roast/
Related Posts with Thumbnails